Tutorial for total newbies on modding diffuse file facial textures in Photoshop cc 2014. You will need to add the Nvidia plugin. This tutorial will also work for photoshop elements 11.
First download and become familiar with the DAITools suite. Just a quick note about DAITools there seems to be an issue with the latest version and modding face complexions. When properly done and merged it seems to cause an infinite loading screen. My suggestion would be to go to the DaiTools forums and pick up an earlier version. http://daitools.freeforums.org/latest-version-announcement-t1065.html
It’s the second one on the page version 16 it works just fine for making face complexions even with the new mod manager. As this tutorial was written when 17 was the one available in the suite it worked fine, but something got changed and the coders are working on it.
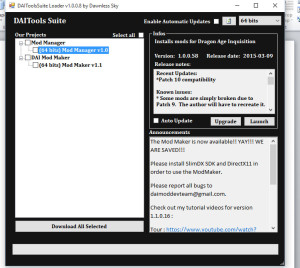
When you open the DAItools Suite it will look like this:
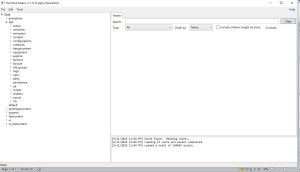
Click on the Mod Maker to select it and click launch. Then a screen will pop up. If it’s your first time loading the mod maker it will ask for the path to your DragonAgeInquisition.exe. This file is usually located in your games directory usually C:\Program Files (x86)\Origin Games\Dragon Age Inquisition . Allow the program to create a cache and load everything this can take a while. Knit a sweater or read the rest of this tutorial while you wait. Once it’s done your screen will look something like this:
Next we need to extract the textures you want to change. For purposes of this tutorial I’m only going to be working with the diffuse texture of the human female Inquisitor’s face. It’s the easiest to modify and is used for all female humans, dwarves and elves (they share textures). The texture we are extracting will modify slot one.
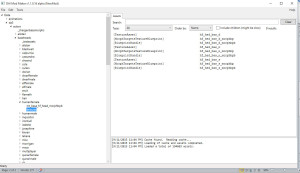
To find the texture you will need to click on triangle beside the word data, then click da3,click actors, baseheads, and finally human females. Under human females you will see two files click on the one that says textures. If you’ve clicked correctly you should see this:
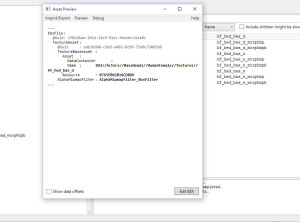
We want the file that says hf_hed_bas_d. Clicking on the file in the window will bring up another screen with more options.
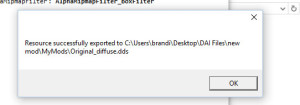
Next you will click on the import/export option. This will give you drop down that for import asset or export asset. Choose export asset. You will need to decide where to put it and pick a name. I have a folder for each mod (even my unsuccessful tries). I usually label the file something like originaldiffuse. If exporting is successful you will get a popup like this:
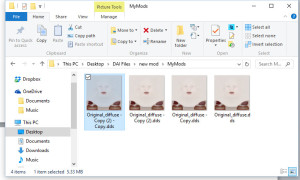
I always check to make sure the file is there. I will tell you to make several copies of the original diffuse you are working with because you will mess up (ex. accidently save over your original I know I did).
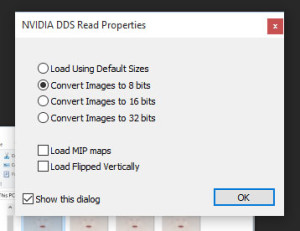
You can close the mod maker if you like but we will be using it later(leaving it open will save time and you having to find the texture again). Now open your photoshop program. Go to open and navigate to where you saved your file. When you open it in Photoshop CC 2014 you will be asked if you want to if you want to load default size or another size choose 8-bit. There are also check boxes for mip-maps leave those empty.
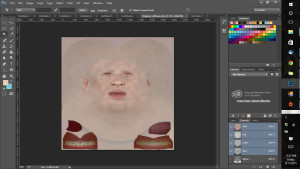
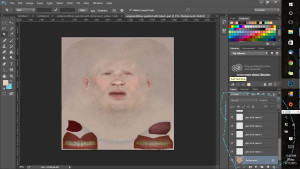
Now you have your diffuse loaded into photoshop.
Now go ahead and make any changes you want. Using the air brush, blur and healing tools are good for creating a soft look. Use lots of layers because you can delete a layer or change it. When adding a layer I always use the soft light option. You will notice I have several layers. I changed the blush took away the moles around the mouth area and added moles above the mouth on the right and under the left eye.
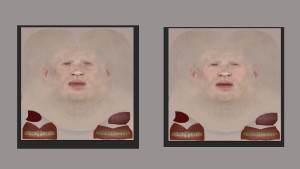
Here is a picture showing the original and modified files.
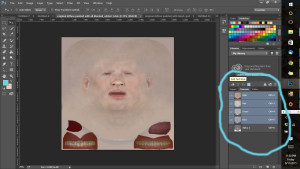
It is perfectly fine to save a work in progress as you go as the default .psd file. Once you are happy with your work merge the image. This will combine your image into one. Thankfully I had some experience with this part when working with photos and website stuff. I purposely exaggerated the cheeks in this diffuse because I wanted the cheeks to be prominent. Once you have merged the image you want to save it. But before we do that we need to look at the channels.
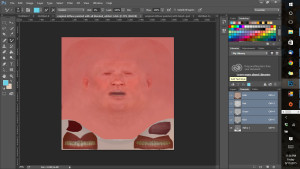
Note the alpha channel is not visible…I found that this needs to be clicked to make it visible. If you don’t click this when you get to the Character Creator(CC), you will not be able to use the skin tints that are available. Clicking it will make your diffuse look red. Don’t let this scare you it’s fine. Upon futher review I found this step is unnecessary but I still do it now out of habit.
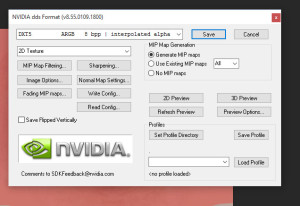
Now we can click “save as.” You will want to pick D3D/DDS, chose a name for the file and pick the alpha option. After clicking that another option screen will come up. You will now need to click the generate mip-maps option and save as DXT5 as shown below. Then click save…I don’t mess with any other options.
Once it is saved we will need to open the mod maker in the DAItools suite (or if you left it open just move to that program). We will need to be working with the same texture we imported (if you closed the mod maker the path is data->da3->actors->baseheads->humanfemale-textures).
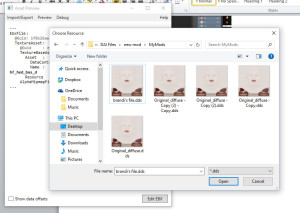
Next click on the same texture asset hf_hed_bas_d. Click on the import/export option. This time when the drop box appears click import.This time box will open prompting you to locate your modified .dds file.
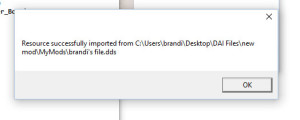
Once you locate it click open and you should get a screen verification letting you know it uploaded.
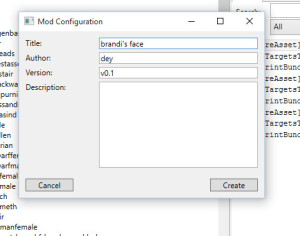
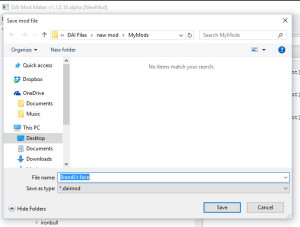
Now we need to create the .daimod file to put into the Mod Manager. To do this we go to file and click save as. Name your mod and add any description you like before clicking create. I’m being lazy so I didn’t add one.
Another screen will pop up prompting you to name the .daimod file itself and to choose a location for it. I usually name it the same and put in the folder with the original file I was working with.
Once it is saved you can close the Mod Maker. You will need to add your new mod file to the file you use to hold your mods for the Mod Manager. I’m not going to explain how to use the Mod Manager. There are wonderful tutorials for that already.
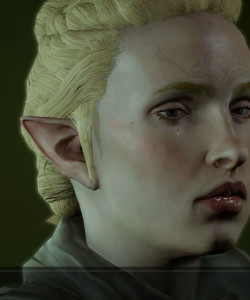
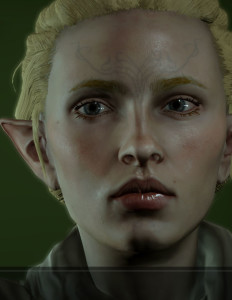
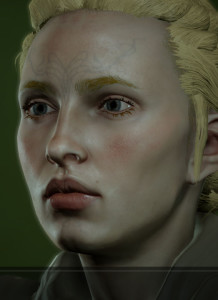
Here are a few shots of my face mod in the CC. I know my changes are subtle I need to play with darker colors and see how it affects it in game.
Some other helpful links.
More information on using the mod maker: http://daitools.freeforums.org/texture-2d-tutorials-f31.html
For more information on the mod manager: http://daitools.freeforums.org/modmanager-f24.html
Tags: #dai modding, DAI, dragon age inquisition


I follow these steps exactly, and my game won’t load past the initial black screen when the mod is enabled. I merged only this complexion mod and the official patch, and still nothing.
Any reason adding a complexion would stop the game from loading? Thanks for your tutorial, it was great and easy to follow!
This is just for the diffuse map. So i am assuming that you didn’t mess with any of the other skin maps. I had the initial black screen when the diffuse is corrupted. I’m not sure why you go the black loading screen without seeing your process. Make sure you are saving as a .dds file (dtx5 with interpolated alpha). Also i am going to assume you are using photoshop as i know some people use gimp and not as familiar with how that works. I also need to figure out why i didn’t get an email notifciation about your quesition so i apologize for the late reply. If you are still having problems I would suggest going the daitool.org forums as well this tutorial is there along with a bunch of people ready to answer questions.
Another thought hit me after my class I didn’t go over how to save it in the modmaker if this is not done correctly and it is not merged with the modmanager correctly as well the mod won’t work.