Well it seems to have happened again…..sigh.
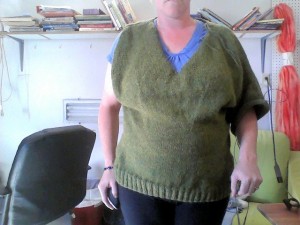
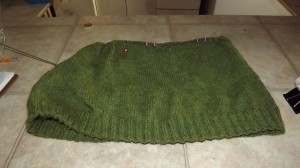
Take a look you’ll see what I mean.
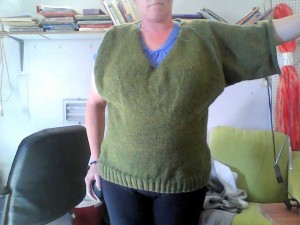
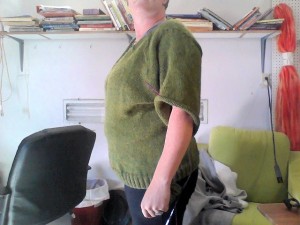
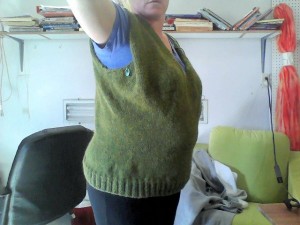
It seems that even with my measurements, adjustments and gauge swatch. I’m still creating stuff that is wayyyy tooo biiigggg!!!
The bust is obviously too big.
The sleeve is huge!!!!!!!!
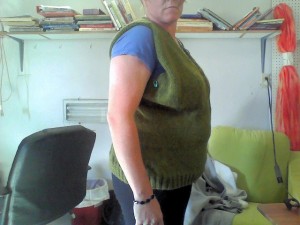
It’s got a large gap of knitting underneath the underarm as well.
Here is the gap from the other side without the sleeve.
Well I guess it’s back to the drawing board.
[madmimi id=3]
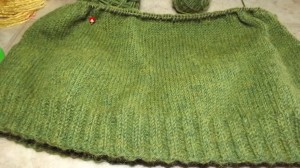
I’ve finished the area with decreases from hip to waist. Since there was about a 10 inch difference between the hip and waist almost as soon as the ribbing was done I started those decreases. I had to go from 262 (131sts front and back) sts to 210)(105 sts front and back) sts at the waist so I decreased over 32 rows and then knit 2 inches regular.
Now I need to start increasing for the bust I’m increasing close to 10 inches again but it’s not quite the same, because I do have a bit less space to do these increases. I’ve figured out I do have curves but they are in a very diminutive space. I know if I don’t do this right I’ll look like a linebacker for the NFL again.
Because I needed to increase so many stitches for the bust I decided to use multiple bust darts. I have 38 rows and well because the math didn’t work out evenly like every other row or every 3 rows I decided to knit 2 rows, do an increase row, knit 3 rows, do an increase row and continue in that way. I’m increasing the back of the sweater to 116 sts so I have some to bind off for the sleeves and because well my upper back is wider than my waist. In the front , “The Girls” are going to require that I increase 48 stitches. That means I have to increase from 105 stitches ( at the waist ) to 153 stitches which will work out perfect for the V-neck start in the front.
Wanna get your fibery fix sign up for the RSS feed on the upper right hand side of this post!
Tags: fiber animal products, knitting, knitting blog, knitting patterns, knitting projects, knitting yarn
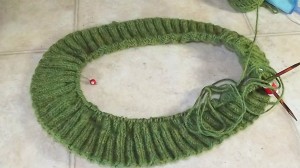
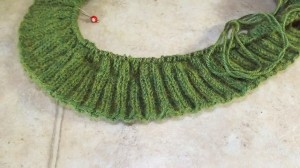
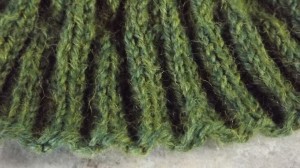
That is what I am going to call this sweater – The I think I lost my Marbles Sweater. After I finished the writing up the pattern I got started immediately. Cast on 262 stitches loosely (putting a marker at 131 stitches) and joined in the round adding a second marker…..I know it doesn’t need to be said that I made sure that I didn’t twist the join. I had to add 2 extra stitches for the ribbing due to a 2 by 2 rib didn’t work with 262 stitches but I just added them during the first round of ribbing no worries there. I worked 13 rows or 2 inches of ribbing and switched to stockinette stitch ( during the first row which normally would have been knit regular I decreased the 2 extra stitches).
Now I am working the hip to waist shaping taking our 4 stitches every other round 13 times. I’m taking two stitches off the front and 2 off the back. Oh I forgot to add that is sweater will be about 24 inches in length when I am finished which should have it hit the mid-hip mark.
I love the color of this yarn!!!!!
[madmimi id=3]
Tags: custom fit sweater, custom vanilla sweater, I've lost my marbles sweater, knitting, knitting blog, knitting good sweaters, knitting patterns, knitting projects, knitting sweater, knitting yarn, sweater pattern
Just to backtrack and set the scene.I decided it was high time I make a sweater for me that fits. Since most of my sweaters end up back in the yarn stash, this is quite a commitment for me. I’ve settled on making my own vanilla sweater pattern . I’ve been studying the greats of custom shaping for sweaters Stephanie Japel, Amy Herzog, Shirley Paden, Wendy Bernard, and Sandi Wiseheart. I’ve been reading Custom Knits, Knit Wear Design Workshop, pouring over my Fit Your Knits Craftsy Class, and checking out Amy and Sandi’s tutorials.
I have realized the problems with my sweaters and although I would normally keep my measurements to myself (I can be a bit sensitive about such things). I’m going to put it all out there. So maybe it could help another knitter who may be having the same issues I am.
Onto the measurements.
Upper torso – 40 in
Bust- 46 in
waist- 36 in
hips -47 in
Upper arm – 12 in
wrist – 6 in
neck depth (shoulder to widest part of bust) – 9.5 in
shoulder to hipbone – 21 inches ( without bust)
shoulder to hipbone w/bust – 24 – inches
hipbone to waist – 4 inches
waist to fullest part of bust – 7.5 inches
(having a mini heart attack now)
I like my tops to hit the mid or lower hip because I have such a short torso ( long legs). Although most patterns have me shortening the length so that I don’t make a bunch of sweater dresses ( unless I want one of course).
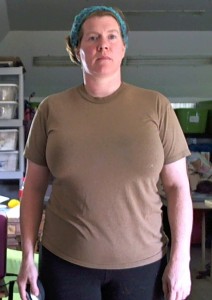
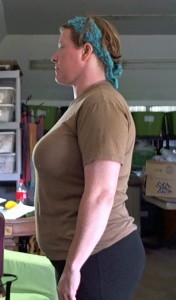
I’ve found that my issues are short torso, bust larger than shoulders, and although I’m a chunky middle aged woman I do have curves they are just confined to a small area. Oh and one more issue many times when I make a sweater to fit my bust size the armholes are HUGE! I have normal sized arms I don’t need all that extra fabric. There was a sweater I made that I thought I could take flight in.
So I took the armhole depth on one of my favorite shirts 9 inches seems to work.
So now that I’ve laid this all out on the line. I will share the pictures.
Next Monday I will go into the details of how I created the a pattern.
If you would like to be notified whenever there is awesomely knitterly update here click the RSS feed
Tags: knitting, knitting blog, knitting good sweaters, knitting patterns, knitting projects, knitting yarn, sweater pattern

Sign up for the Fiber Fanatic Files for your scandalous woolly updates and get free shipping on your first order!!!!!
Tags: fiber animal products, fiber processing, spinning fiber, spinning fiber roving
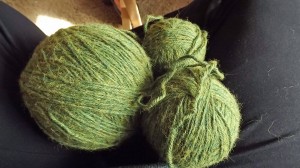
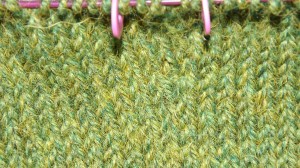
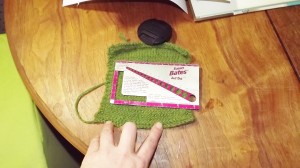
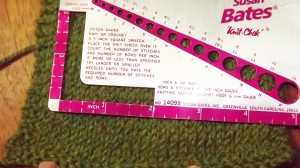
The first thing I decided to do was pick a yarn, needles and do a gauge swatch. I decided on a worsted weight I had about 1500 yards of Berroco ultra alpaca in my stash. I grabbed some size 7 needles and cast on 30 stitches, I tried to keep the edges from rolling so much by adding a bit of garter stitch around the edges and set to making a swatch in stockinette stitch.
I need more garter stitch in future swatches I think.
Anyhow, my gauge came out to be – 22 sts and 26 rows = 4 inches
Now that I have a gauge I needed to decide if I wanted work top – down, bottom – up, raglan sleeves, afterthought sleeves, set in sleeves, V-neck, scoop-neck so many possibilities. I knew I would need vertical bust darts, I’ve only ever done short rows. Part of the deciding factor was that the tutorials with vertical bust darts were from the bottom-up and I was having a hard time visualizing it from the top down when one of my biggest issues is a sweater being too big on my upper torso….. to reverse engineer it would require me just starting increases right above the bust until I got the fullest point and starting decreases right away. It could be done but I wanted a v-neck at the same time and decreases seemed to be easier on my already taxed brain.
So here is how the sweater will be assembled.
Worked from the bottom up in the round. V-neck with 2 by 2 ribbing on the end hem, neckline and wrists. 4 bust darts to accommodate <ahem> “the girls” ,basic shaping through the waist and hips, a close fit 1-2 inches of ease, Knit on sleeves with a short row sleeve cap.
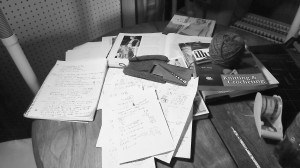
And there it is a vanilla sweater pattern customized for me. Here was my workspace when I finished writing up the pattern.
If you would like to know more about what’s going on around the farm and store upcoming specials sign up for the newsletter!
Tags: custom vanilla sweater, knitting, knitting blog, knitting good sweaters, knitting patterns, knitting projects, knitting sweater, knitting yarn, sweater pattern

